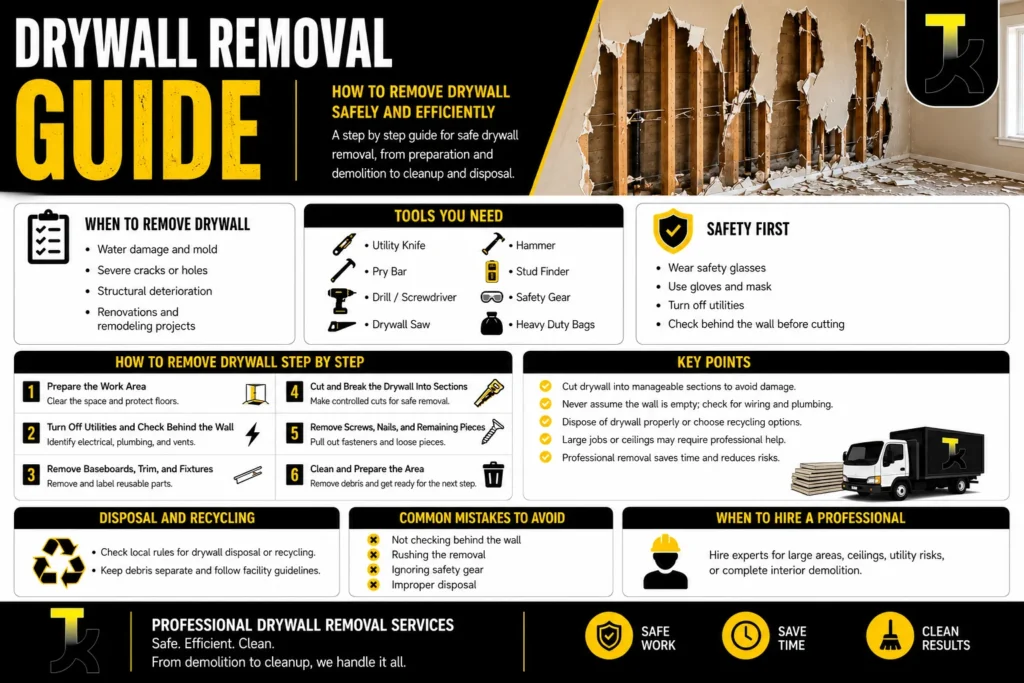
Summary: This guide explains drywall removal from preparation and safety checks to demolition, cleanup, and disposal. You will learn how to remove drywall safely, which tools to use, how to protect plumbing and electrical systems, and what affects removal costs. For larger renovation projects, our professional team provides Vancouver drywall removal, debris handling, and post-removal cleanup with a practical, safety-focused approach.
What Is Drywall Removal?
Drywall removal is the process of taking existing gypsum wall or ceiling panels out before renovation, repair, remodeling, or interior demolition. The drywall removal process usually includes locating fasteners, cutting panels into manageable sections, removing screws or nails, and clearing the resulting construction waste.
Professional removal focuses on controlled demolition rather than simply breaking the wall apart. This approach helps protect framing, wiring, plumbing, insulation, flooring, and other materials behind the drywall.
When Should You Remove Drywall?
You may need drywall removal when panels have severe water damage, mold growth, structural deterioration, or extensive cracks. Removal also makes sense when you are changing a room layout or replacing damaged wall sections.
Signs Your Drywall Needs Removal:
Look for soft or swollen panels, recurring moisture stains, crumbling gypsum, large holes, or damage that extends deep into the wall. If moisture has reached insulation or framing, removing the affected section can help expose the underlying problem.
Drywall Removal for Renovations and Remodeling:
Renovation projects often require drywall demolition before installing new walls, moving electrical systems, replacing insulation, or changing room layouts. Controlled removal creates a cleaner starting point and makes the next stage of construction easier.
What Tools Do You Need for Drywall Removal?
Knowing what tools are needed to remove drywall can make the work faster and safer. Common equipment includes a utility knife, pry bar, drill or screwdriver, hammer, drywall saw, stud finder, work gloves, safety glasses, dust mask, and heavy-duty drywall bags.
Essential Drywall Removal Tools:
Use a utility knife for controlled cuts and a drywall saw for opening larger sections. A drill helps remove screws, while a pry bar can loosen stubborn panels. For larger jobs, professional crews may use specific demolition equipment while keeping cuts controlled.
Safety Equipment You Should Wear:
Wear eye protection, gloves, sturdy footwear, and suitable respiratory protection. Cover nearby furniture and flooring before starting. Dust can spread quickly, so proper ventilation and containment are important during drywall removal.
How to Remove Drywall Step by Step:
Junking’s experts guide you through the ” How to Remove Drywall Step-by-Step Guide.
1. Prepare the Work Area:
Clear furniture and personal belongings from the room. Cover floors and seal nearby openings where practical. Keep a designated area for debris so the drywall removal process stays organized.
2. Turn Off Utilities and Check Behind the Wall:
Before cutting, identify electrical outlets, switches, plumbing lines, vents, and other utilities. Turn off the relevant electrical circuits and confirm the wall is safe to open. Never assume an empty-looking wall contains no services.
3. Remove Baseboards, Trim, and Fixtures:
Carefully remove baseboards, trim, shelving, wall-mounted fixtures, and outlet covers. Label reusable components so they can be reinstalled later.
4. Cut and Break the Drywall Into Sections:
Score the drywall and create manageable sections instead of pulling down entire sheets at once. For how to remove drywall safely, controlled cuts are one of the most important steps because they reduce accidental damage behind the wall. For ceilings, support the panel as you loosen it. Drywall ceiling removal can be more demanding because gravity works against you, so consider professional assistance for large or elevated areas.
5. Remove Screws, Nails, and Remaining Pieces:
Pull out exposed screws and nails with the appropriate tool. If you leave fasteners in the framing, they can interfere with new drywall installation and create unnecessary hazards.
6. Clean and Prepare the Area:
Collect loose gypsum, insulation, fasteners, and other debris. Finish with post-removal cleanup so the framing and work area are ready for inspection or renovation.
How to Remove Drywall Without Damaging What Is Behind It:
The safest approach uses small cuts around known utilities and framing. Avoid blindly driving tools deep into the wall. If you are working around plumbing, electrical wiring, insulation, or structural components, slow removal is better than aggressive demolition.
The same principle applies when performing drywall wall removal or partial wall demolition. Remove only the material required for the project and inspect exposed areas before continuing.
How Much Does Drywall Removal Cost?
The cost depends on room size, wall height, accessibility, material condition, debris volume, and whether additional demolition or cleanup is required.
Factors That Affect Drywall Removal Cost:
Major cost factors include labor, project size, ceiling height, difficult access, utility protection, disposal fees, and the amount of construction debris produced. Additional work may also increase the price.
DIY vs. Professional Drywall Removal Cost:
DIY removal may reduce labor expenses, but you remain responsible for tools, safety, transportation, and drywall disposal. Professional service can save time and reduce the risk of damaging hidden systems.
Can You Remove Drywall Yourself?
Yes, small and accessible projects may be suitable for experienced homeowners. However, stop if you discover unknown wiring, plumbing, mold, structural concerns, or other hazards. Knowing how to remove drywall is only part of the job. Knowing when to stop is equally important.
Wall anchors also require care. To remove the drywall anchor, first identify the anchor type. Some can be pulled out, while others require unscrewing or pushing through the wall. If you are searching for how to remove wall anchors from drywall, avoid excessive force because it can enlarge the hole.
For questions such as how do you take out drywall anchors, how do you remove a wall anchor, or how to remove drywall anchors, the correct method depends on whether the anchor is threaded, expansion-based, or a toggle type.
When Should You Hire a Professional Drywall Removal Service?
Hire professionals when the project include multiple rooms, ceilings, extensive demolition, difficult access, or potential utility hazards. Professional crews can manage interior demolition Vancouver projects while coordinating debris removal and site cleanup.
For homeowners planning renovations, construction debris removal Vancouver and renovation debris removal Vancouver services can simplify the entire project. Professional waste removal services can also reduce the time needed to transport heavy debris.
How to Dispose of Old Drywall
Do not automatically place large amounts of gypsum in regular household garbage. Check local requirements before transporting renovation debris.
Drywall Disposal and Recycling Options:
Clean gypsum may qualify for drywall recycling, depending on local facilities and contamination levels. Painted, wet, or mixed materials may have different handling requirements. Proper construction debris management keeps reusable and recyclable materials separate.
If you need waste disposal near me, confirm what materials your selected facility accepts before loading your vehicle. Local removal companies Vancouver can also help with larger renovation loads.
Common Mistakes to Avoid During Drywall Removal
Avoid removing large panels without checking behind them, cutting near unknown utilities, skipping protective equipment, or allowing debris to accumulate around your work area. Do not ignore proper drywall disposal requirements either.
Drywall Removal Safety Tips
Always protect your eyes, hands, lungs, and feet. Control dust, maintain ventilation, isolate electrical circuits, and inspect exposed framing before proceeding. For extensive drywall demolition, professional assessment can reduce risks and keep the renovation moving efficiently.
Frequently Asked Questions:
How long does it take to remove drywall?
A small room may take several hours, while larger projects can take a full day or longer. Accessibility and debris volume affect the timeline.
Is drywall removal difficult?
Small sections are manageable with proper tools. Large walls, ceilings, and utility-heavy areas require more skill and caution.
What is the easiest way to remove drywall?
The easiest method is to score panels, remove them in manageable sections, and take out fasteners as you expose the framing.
How much does it cost to remove drywall?
Pricing varies by project size, labor, accessibility, debris volume, and disposal requirements. An on-site assessment provides a more accurate estimate.
Can drywall be recycled after removal?
Yes. Some facilities accept clean gypsum for recycling, but local rules and contamination restrictions apply.
Professional Drywall Removal Services:
Our team helps homeowners and contractors with controlled drywall removal, drywall ceiling removal, debris handling, and post-removal cleanup. We focus on safe work practices, careful demolition, and efficient site preparation. If your renovation requires wall removal in Vancouver, construction debris removal in Vancouver, or complete waste removal services, professional support can make the process cleaner and easier. Contact our team for a project assessment and practical removal solution customized to your renovation needs.